Hair for Halloween can be as simple as slicked-back, ghostly hair or as recognisable as Wednesday Addams’s fringe and braided pigtails. You can build a horror-film look with gel, shape a no-gel mohawk, or choose a quick style that works without a full costume. The guide also includes Halloween hairstyles that can be completed in 20 minutes or less.
You don’t need a complicated look to make an impact. A few deliberate details can transform everyday hair into something eerie, playful or gloriously gothic, whether you’re dressing up fully or adding just a spooky edge.
Explore ideas inspired by horror films, Wednesday Addams and grungy ghostly looks, with practical steps to make each style your own. From quick fixes to bolder transformations, find a look to suit your hair, mood and Halloween plans.
Key Takeaways
- Build a horror-film-inspired look with deliberate texture and styling details, from slick, soaked strands to jagged fringe.
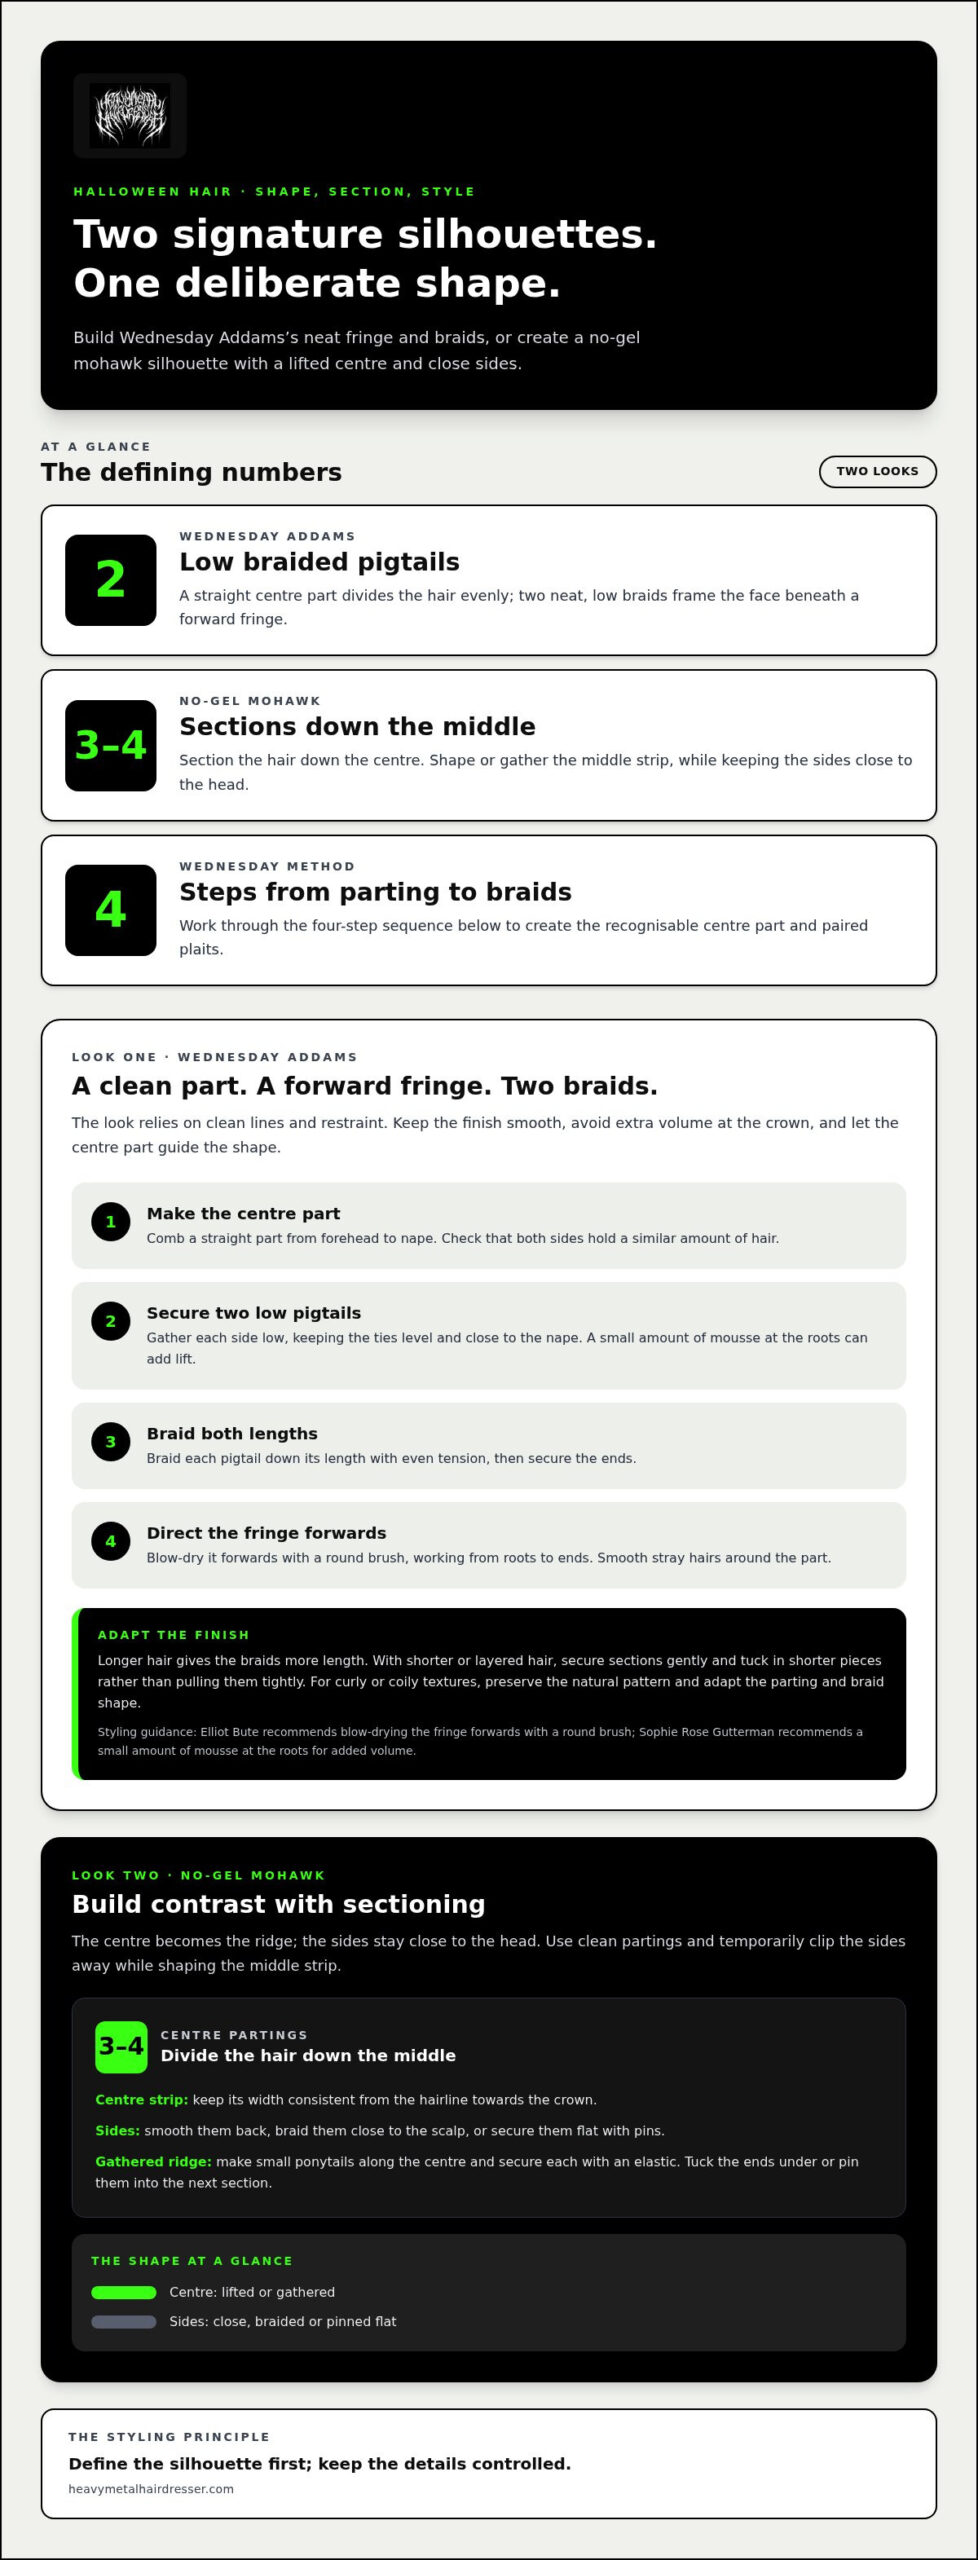
- For Wednesday Addams-inspired hair, direct the fringe forwards and create two evenly divided, low braided pigtails.
- Shape a no-gel mohawk by sectioning the hair down the middle, then use the guide’s techniques to create structure without traditional styling gel.
- Try an undone ghostly finish by brushing hair forwards, or lean into a grungier mood with icy tones and dark details.
- Short on time or skipping a costume? Explore quick options such as a slick-back look, a delicate veil or a bold headpiece.
1. Halloween hairstyles inspired by horror films
For a Samara-inspired look from The Ring, work plenty of hair gel through black hair, then comb it forward across the face. Keep the lengths separated and slightly damp-looking for a screen-haunting finish. For Squid Game character Kang Sae-byeok’s jagged fringe, position a clip-in fringe and trim its edge. Separate the bangs with gel for a broken-up shape.
For a Cheetah-inspired look, slick the hair close to your head and let graphic makeup create the wild-cat mood. A sharp part or swept-back finish gives the style a deliberate, stage-ready outline. Take the same approach to runway-inspired Halloween hair: choose one strong detail, such as a severe side part, sculpted waves or a dramatic accessory, and keep the rest controlled.
To recreate popular film-inspired styles, start with a reference image and identify its defining feature. For Samara, comb gel through damp hair and direct it forward; for Kang Sae-byeok, position a clip-in fringe, shape its edge, then separate the bangs. Add makeup or an accessory only once the hair shape is set.
For a Beyoncé-inspired voluminous blowout, Sam McKnight recommends hot rollers or sleeping in Velcro rollers to add height and volume. Apply heat protectant before using heated tools, then let the shape cool before removing the rollers. Use clips or pins to section hair, a comb for neat parts, rollers for lift and a curling iron where you want defined movement.
Temporary colour gives Halloween hair a vivid change without permanent dye. Hair chalk, colour spray or holographic heat-activated gel can create a wash-away hair print; blue or purple accents add a witchy flash to natural texture. Products vary in how they apply and wash out, so follow the directions and rinse thoroughly. The NHS advises rinsing hair until the water runs clear.
In the UK, the cost of extensions, wigs and temporary dyes depends on the item, its length and quality, and whether you buy or hire it. For a colour change, choose a temporary product designed to wash out rather than permanent dye.
Protect your hair by applying heat protectant before using styling tools, keeping heated tools moving and following product instructions. Wash out styling products gently, rinse until the water runs clear, and don’t pull forcefully at tangled extensions or hair. For children or sensitive scalps, choose a simple, low-tension style, such as a soft fringe accessory, and avoid products that cause irritation.
2. Wednesday Addams fringe and braided pigtails
Wednesday Addams’s look relies on clean lines and deliberate restraint. Her fringe sits forward, while two dark braids frame the face. Keep the finish smooth, not overly polished, and let a centre part guide the shape. The result reads as Wednesday without elaborate accessories or a full costume.
Start with the fringe. Hairstylist Elliot Bute recommends blow-drying it forward with a round brush. Work from the roots towards the ends, directing the hair down over your forehead. A round brush helps control the curve and stops the fringe splitting as it dries. If your fringe naturally parts to one side, brush it forward while damp before shaping it.
Check the fringe from the front and sides in a mirror. Aim for an even line at your preferred length, rather than forcing every strand into an identical shape. A little movement makes it wearable beyond Halloween. For a sharper Wednesday effect, keep the rest of your hair neat and avoid adding volume at the crown.
For the braids, part the hair evenly from forehead to nape, then secure two low pigtails. A straight centre part creates Wednesday’s familiar symmetry. Sophie Rose Gutterman recommends applying a small amount of mousse to the roots for added volume. Work it through the root area before parting the hair, so the pigtails have lift without losing their controlled shape.
- Comb a straight centre part from the forehead to the nape, then check that both sides hold a similar amount of hair.
- Gather each side into a low pigtail, keeping the ties level and close to the nape.
- Braid each pigtail down its length, keeping the tension even, then secure the ends.
- Bring the fringe forwards with a round brush and smooth stray hairs around the part.
Hair length and texture affect the finish. Longer hair gives the braids more length; shorter hair can still capture the character with the fringe and low, secured sections. If your hair is layered, braid gently and tuck in shorter pieces rather than pulling them tightly. For curly or coily textures, preserve your natural pattern and adapt the parting and braid shape to your hair.
Keep the styling focused: a clean part, a forward fringe and two low braids do the character work. For a more alternative cut that keeps its edge after Halloween, explore shag-inspired hair ideas.
3. A no-gel mohawk style
A mohawk silhouette doesn’t need gel to stand out. The key is contrast: lift or gather the hair along the centre, then keep the sides close to the head. Part the hair into 3-4 sections down the middle, as recommended in the style instructions. Sectioning gives you control over the shape and helps distribute the centre strip evenly.
Use a comb to make clean partings, then temporarily clip the side sections away. The centre section forms the ridge, so keep its width consistent from the hairline towards the crown. The side sections create contrast. Smooth them back, braid them close to the scalp or secure them flat with pins. Choose a method that suits your hair’s length and texture.
- Start with detangled hair, then use a comb to create the centre partings and divide the hair into 3-4 sections.
- Clip the side sections out of the way while you shape the centre strip.
- For a gathered ridge, make small ponytails along the centre and secure each with an elastic. Tuck the ends under or pin them into the next section.
- For a flatter, more sculpted finish, braid the side sections close to the scalp and pin the ends discreetly.
- Release the clips, check the silhouette from the front and side, then adjust loose sections with pins.
Without gel, a mohawk’s structure comes from placement and tension. Small ponytails create a raised, segmented ridge, while pinned twists give a softer, less rigid outline. Keep pins close to the scalp and angled into the hair so they hold discreetly. If the centre strip is long, fold the ends under rather than leaving them loose.
Hair texture changes the result. Straight hair can form a crisp ridge with neatly aligned sections. Natural curls or coils bring their own volume, so preserve the texture and gather the sides without flattening the centre. For shorter hair, keep the silhouette narrow and use small sections; longer hair gives you more length to fold and pin along the middle.
Make the style your own with a deliberate parting or a vivid temporary accent, rather than relying on sticky product. A side braid can sharpen the contrast, while loose curls along the centre create a less severe, punk-inspired finish. Check that pins feel secure without pulling, especially around the hairline. The final shape should read as a mohawk from the front, side and back, not just from one camera angle.
For a sharper finish, check your reflection and adjust the centre ridge before adding accessories. A no-gel mohawk can look structured or deliberately undone, depending on how tightly you pin each section. Keep the shape comfortable, let your natural texture do some of the work and make the silhouette unmistakably yours.
4. Grungy and ghostly hair looks
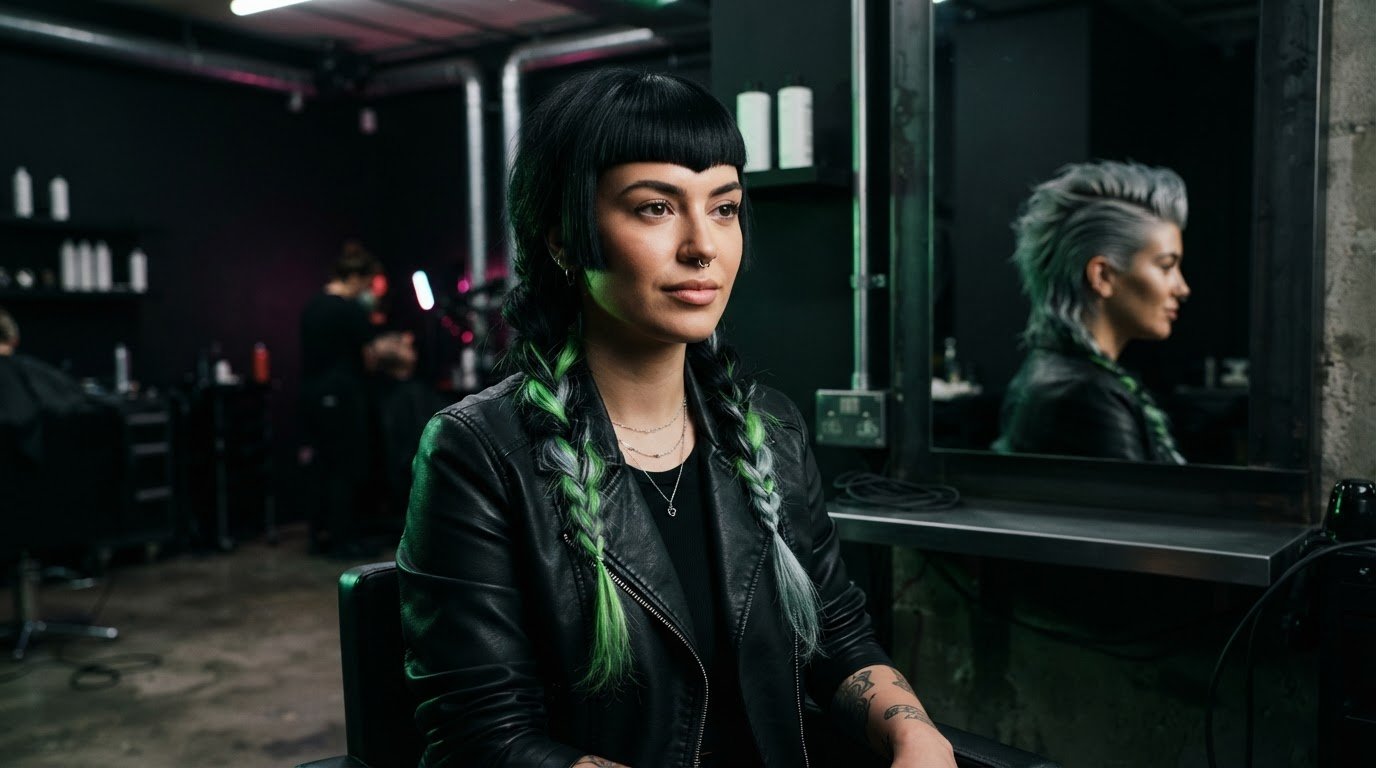
For an undone, ghostly finish, brush your hair forward and let the strands fall naturally around your face. Aim for a displaced shape, not perfectly sculpted waves. Start with a centre or side part, then sweep the front sections forward with your fingers or a soft brush. Leave a few pieces loose to break up the outline.
For a romantic grunge look, pair icy-toned hair with a cool-toned smoky eye. The contrast creates a spectral chill without elaborate styling. Keep your hair relaxed, then build the smoky eye around cool shades that echo its tone. Temporary colour can shift the overall effect for Halloween without a permanent change.
- Brush the front sections forwards to create an unstructured, haunted silhouette.
- Pair an icy hair tone with cool-toned smoky eye makeup for a romantic, grungy mood.
- Add an inky black dip dye to bring dark contrast through the lengths.
- Choose a delicate black veil and a moody expression for a spooky finish that needs little hairstyling skill.
An inky black dip dye gives a grungy look a stronger edge. Concentrate the dark colour towards the ends for a deliberate contrast with the rest of your hair. Keep the top loose and undone, or brush it forward to connect the colour with a ghostly shape. The dip-dye detail can carry the look without elaborate curls or a precise updo.
For a low-effort apparition, let the veil do the visual work. Position a delicate black veil so it frames rather than hides your hair and face. Add a moody expression and keep the styling simple. This approach suits hair that’s already textured or layered, as loose strands soften the veil’s edge. Avoid overworking the shape: the contrast between the veil and bare hair creates the spooky effect.
To combine these ideas, brush the front forward, keep the lengths slightly dishevelled, then add a veil or dark colour detail. An icy tone and smoky eye create a romantic mood; black dip-dyed ends lean grungier. Choose one strong feature first, such as the veil or darkened lengths, and let the rest support it. That keeps the finish intentional rather than cluttered.
For a cohesive finish, decide whether your hair or the veil will provide the strongest contrast. Inky black dip-dyed ends create a grungy Halloween look, while keeping the dark colour towards the ends distinguishes them from the rest of your hair. If you choose a veil, leave a few loose strands visible around it. Either works with an unstructured shape; avoid so many details that the hair, colour and accessory compete for attention.
The mood can stay soft and spectral even when the colour is dark. Brush the front forward, let the lengths fall naturally, and echo an icy hair tone with a cool smoky eye for a more romantic direction. For a stronger grunge impression, focus on the darkened ends and keep the rest of the styling restrained. A veil can finish either look, provided it frames your face without hiding your hair.
5. Quick Halloween hairstyles without a costume
Hair for Halloween doesn’t need a costume to make a statement. A slick-back creates an ocean-inspired effect in a few minutes. Smooth your hair away from your face, then choose a sharp or loose finish to set the mood.
Short, medium and long hair can all work for a quick Halloween look. Short hair suits a bold clip; medium lengths work well in double buns, while longer hair gives ponytails and braids room to show. Choose a style to suit your length and texture rather than forcing your hair to match a reference.
For a Sailor Moon-inspired style, divide the hair into two sections on top of your head and make two ponytails. Wrap each around its hair tie, then secure it with bobby pins. Leave shorter strands loose or pin them close to each bun for a neater silhouette.
Want colour without a costume? Add blue or purple accents to your natural texture for a witchy flash, or use temporary hair chalk, colour spray or holographic heat-activated gel for a wash-away hair print. Choose one colourful detail and place it where it catches the light, such as at the fringe or ends.
A high-fashion headpiece can turn a familiar style into a complete Halloween look. Try a headband, clip or mask with a slick-back, ponytail or loose hair. A delicate gothic veil is another quick option, adding a darker mood without complicated styling. Keep the accessory as the focal point and let your everyday hair do the rest.
For a Barbie-inspired ponytail, gather your hair high and wrap a small section around the base. Secure it underneath with a bobby pin for a clean finish. A polished ponytail suits a doll-inspired outfit, while double buns pair naturally with a moon-princess costume. Slicked-back hair works with ocean-inspired characters, and a veil gives simple dark clothing a ghostly edge.
Several quick styles can fit within 20 minutes, depending on your hair and the finish you choose. A ponytail, headpiece or slick-back needs fewer steps than detailed curls. Make hair for Halloween feel personal by choosing one defining feature, then keep pins, elastics and accessories ready before styling.
For a look that outlasts the night, explore a bolder hair shape and make your everyday style part of the statement.
When time is short, keep the finish simple. A slick-back creates a creepy Halloween look in minutes, with an ocean-inspired edge. A delicate gothic veil saves styling time, while a high-fashion headpiece, such as a headband, clip or mask, makes your hair feel deliberate without complicated styling.
For a Barbie-inspired ponytail, hairstylist Eduardo Ponce recommends wrapping a small section of hair around the base and securing it with a bobby pin. For Maddy Perez-inspired hair gems, hairstylist Becca Mader recommends smoothing the hair and securing it with an elastic band before styling the ends and adding gems. Choose the wrapped ponytail base or hair gems as your defining detail.
Heavy Metal Hairdresser: Shag Haircuts
Heavy Metal Hairdresser can turn a one-night Halloween mood into a haircut with lasting attitude. Its Shag Haircuts add layered shape and texture, making them a natural fit for undone, grungy styling beyond the party. For a sharper, more dramatic silhouette, explore Wolfcuts or Hair To the Throne.
Bring reference images and describe the details you want to keep, such as your fringe, movement or length. This gives your stylist a clear starting point for shaping an alternative look around your hair and personal style. Guest Spots offer another way to discover a different creative perspective.
Ready to make the look your own? Contact Heavy Metal Hairdresser or visit heavymetalhairdresser.com.
Make the look your own beyond Halloween
Let Halloween be a starting point, not a costume you pack away. The strongest alternative style is one you can keep shaping after the decorations come down. Think about which detail felt most like you: a bold fringe, unruly texture, a sharper outline or a change in length. Let that choice guide your next cut and how you wear your hair day to day.
For a lasting shift, Heavy Metal Hairdresser offers Shag Haircuts and Wolfcuts that leave plenty of room for individual expression. Guest Spots bring another creative perspective if you want to explore a fresh direction. Choose a reference that captures the feeling you want, then make it yours. Your hair for Halloween can spark a style that keeps evolving.
Contact Heavy Metal Hairdresser to talk through your next look. Keep experimenting, trust your own edge and wear the result with confidence.
Frequently Asked Questions
Ready to style something spooky-sweet?
Yes. Pair a soft half-up style with dark ribbons for a look that balances cute and eerie. Take a section from each temple, twist both towards the back, then secure them with a ribbon or clip. Add a small bow for a sweeter finish, or choose a black accessory for a darker twist. This works with straight, wavy or curly hair, keeping your natural texture part of the look.
What are easy Halloween hairstyles to do at home?
A twisted crown is a simple option that needs no specialist tools. Make a side part, twist a section from each side of your face towards the back, then pin the ends beneath your hair at the nape. Leave the remaining lengths loose for a relaxed finish. It pairs well with woodland, fairy or vampire-inspired outfits; adjust the mood with a single accessory or a change of parting.