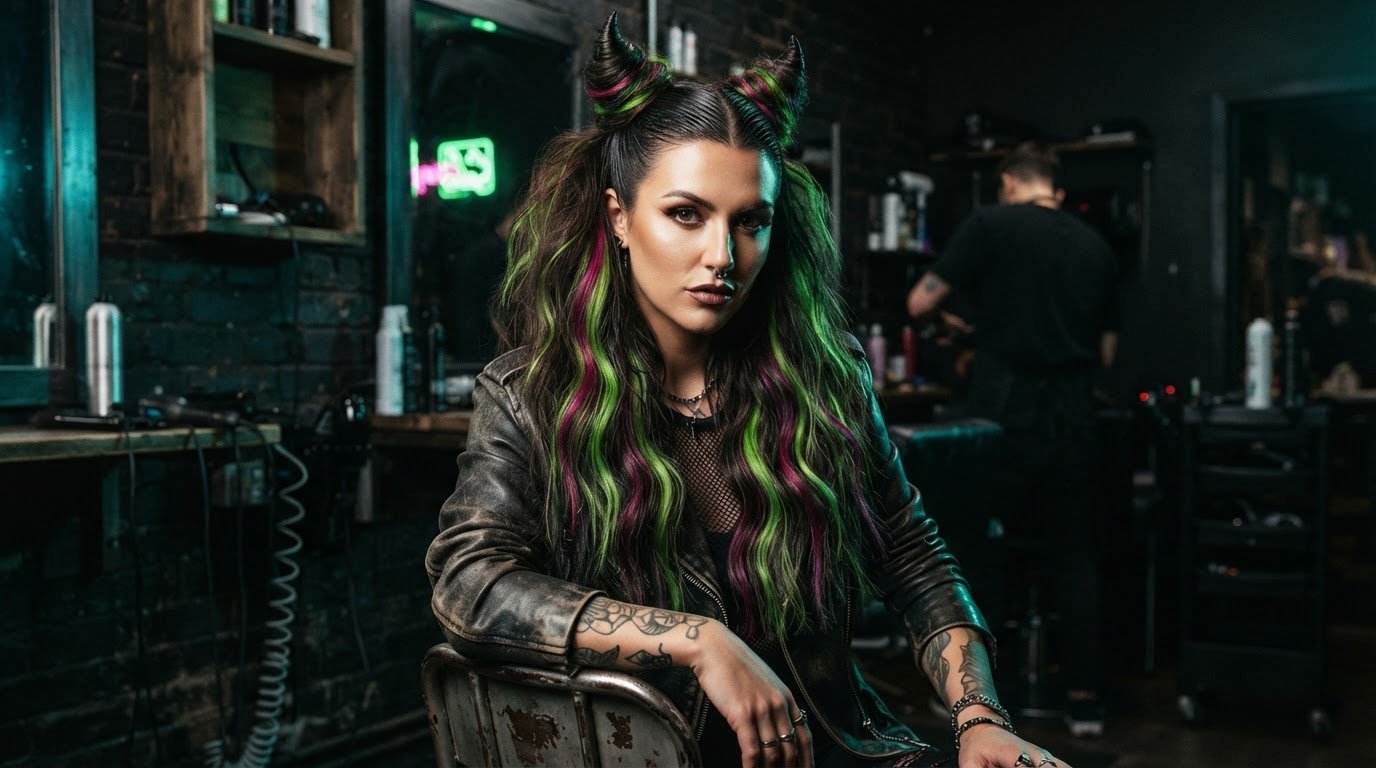
Halloween hair doesn’t need a full costume to make a statement. The looks in this guide can be created at home in under 30 minutes, from devil horn buns and sleek vampire hair to zombie volume, witchy waves and Frankenstein-inspired streaks.
A striking style should feel like you, not a disguise you can’t wait to take off. Whether you want something sharp and polished or gloriously messy, the right shape and texture can bring your Halloween hair to life.
Here are ideas for different moods and hair textures, plus practical styling tips for each look: sculpted buns for devil horns, slicked-back lengths for vampire drama, teased volume for a zombie finish, loose waves with a witchy edge, and vivid streaks inspired by Frankenstein. Pick a favourite, make it your own, and let your hair join the Halloween mischief.
Key Takeaways
- Build devil horn buns by dividing your hair into four sections; two small empty cardboard tubes can help shape the horns.
- Choose a sleek, controlled finish for vampire-inspired hair, or push texture and lift for a more undone zombie look.
- Create witchy waves by alternating the direction of each curl for a looser, more natural-looking shape.
- Use bold, contrasting streaks to bring a Bride of Frankenstein look to life without changing your whole style.
- These Halloween looks can be created at home in under 30 minutes, so you can pick a style that suits your mood and get straight to the good part.
1. Devil horn buns
To make devil horn buns, divide your hair into four sections, then use the two upper sections to build a horn on each side. Shape each section around a small empty cardboard tube, secure it into a bun, and adjust the points until they read as horns. This Halloween hair look can be created at home in under 30 minutes.
Start with dry, detangled hair so each section is easier to control. Use a centre part as your guide, then separate the hair from ear to ear. You’ll have four sections: two at the front and two at the back. Tie the lower sections out of the way. The upper pair will become the devil horns, one on either side of the parting.
Take a small, empty cardboard tube and hold it upright where you want the first horn. Wrap the front section around the tube, keeping the hair smooth and snug. The tube acts as a template, giving the bun a more defined, pointed shape than a loose knot. Repeat on the other side with the second tube, checking that both horns face the same direction.
Once each section is wrapped, carefully slide out the tube if the shape holds. Pin the wrapped hair close to the scalp, using pins that match your hair colour where possible. If the horn softens, wrap the section more tightly around the tube before securing it. Keep the base firm and the tip narrow for a clear devil-horn outline.
Now release the lower sections. Leave them loose for dramatic contrast, or twist them into small buns beneath the horns. For a sharper finish, smooth flyaways around the parting and bases. For a rougher, punk-inspired look, leave a few wisps around your face. A clean centre part makes the horns look symmetrical, while a slightly uneven finish feels deliberately chaotic.
Check the silhouette from the front and side before adding final pins. If one horn looks flatter, adjust its wrapped section instead of pulling hard at the tip. The cardboard templates help create matching shapes, but your hair’s length and density affect how much you can wrap into each bun. Keep the style comfortable, with pins that hold without digging into your scalp.
For a full costume, pair the horns with dark eye make-up or a red accessory; the hairstyle can also stand alone. The four-section method gives you a clear structure, while the two tubes make shaping easier. Keep the lower hair loose for movement, or pin it up for a compact silhouette that stays focused on the horns.
2. Sleek vampire hair
Sleek vampire hair turns a sharp parting and glossy lengths into a dark, deliberate look. Start with dry, detangled hair, then decide whether you want a centre part, a deep side part or hair swept straight back. A centre part gives a classic, balanced silhouette; a side part adds a more dramatic angle.
To create the style, draw your part with a comb and work a small amount of styling product through the roots. Brush each side close to your head, guiding the lengths behind your shoulders or into a low ponytail. Secure the ponytail firmly, then smooth the surface with your hands. Keep the lengths straight for a severe finish, or add a neat twist at the base.
For short hair, comb the sides close and shape the top into a deliberate wave or slicked-back ridge. Gather long hair into a low ponytail, while curly hair can keep its natural pattern through the lengths, with only the roots smoothed. Straight hair gives the most uniform, glassy outline, but a clear parting and controlled shape bring out the vampire effect on any texture.
Popular Halloween hairstyles are easiest to create in stages: choose the shape, part the hair, smooth or sculpt the roots, then secure the finish. For vampire hair, use a comb and pins rather than heat. For a different character, shape a bun or tease the roots. A defined silhouette does more for a costume than complicated decoration.
Temporary colour sprays and dyes vary, so choose a product labelled for temporary hair colour and follow its directions for application and removal. Keep colour away from your eyes, and wash it out as instructed rather than scrubbing aggressively. Avoid coloured or glitter sprays on human hair extensions, as they can be difficult to wash out.
For a heat-free finish, use a comb, pins, ties and styling product to create the shape, and avoid hot tools. A sleek look relies on direction and control, not heat. To help it last through a party or trick-or-treating, secure gathered hair with a firm tie and pins, then smooth loose sections with your hands instead of repeatedly brushing them.
Scalp sensitivity matters with temporary colour. Read the label, follow its safety directions and avoid applying product to irritated skin. For children, choose products whose instructions allow their use, and have an adult apply and remove them. Stop using a product and rinse it away if discomfort develops.
3. Undead zombie volume
Zombie hair needs height, uneven texture and a finish that looks deliberately wrecked. You can create this Halloween look at home in under 30 minutes, using backcombing and separated sections rather than a polished shape. Keep the volume concentrated near the roots, then let the lengths fall irregularly. That contrast gives the style its unsettling, freshly risen-from-the-grave energy.
Begin with dry hair and divide it into workable sections. Lift a section near the crown, hold it away from your head, then comb gently towards the roots. Repeat with nearby sections, building height where you want the silhouette to look most dramatic. Use lighter pressure around the hairline, where visible knots can make the style uncomfortable or difficult to shape.
For a controlled finish, smooth only the outer surface with your hands. Don’t brush through the teased roots, or you’ll flatten the lift you’ve created. Leave a few strands across the forehead or temples for a disordered edge. On straight hair, stagger the direction of those loose pieces; on naturally wavy hair, let the existing bends add extra movement.
Curly hair brings its own texture to a zombie look. Avoid excessive brushing to help prevent frizz and preserve the curls’ structure. Instead, lift the roots with your fingers, then separate only the areas that need more height. This keeps the curl pattern visible while making the overall shape rougher. A few deliberately shifted curls can look more convincing than brushing out your whole head.
Short hair can still carry undead volume. Backcomb the crown and top, then use your fingers to push sections in different directions. With longer hair, create lift at the crown and leave the lengths loose, or gather them into an uneven low tie. Keep the sides flatter to make the raised centre stand out, or add texture around the face for a more chaotic silhouette.
Finish by checking the shape from the front and side. If the crown looks too uniform, loosen and reposition a small section rather than rebuilding the whole style. If your costume includes a hood or hat, keep the highest volume clear of where it sits so the accessory doesn’t crush the teased roots. Aim for controlled mess, not a solid, tangled mass.
Make the look your own with a temporary colour accent or a few dark accessories, keeping the focus on shape and texture. Zombie volume works best when each section points in a slightly different direction but the crown still holds a clear outline. That balance turns ordinary bedhead into a recognisable undead finish.
For fine hair, the guide advises against using Ultra Volume Clip-Ins because they are too heavy. Build the silhouette with gentle backcombing at the crown instead, and lightly smooth the outer layer so the lift stays visible. If the shape needs adjusting, reposition a few strands rather than adding weight or brushing through the teased roots. A deliberately uneven outline keeps the look untidy without sacrificing height.

4. Witchy long waves
Witchy long waves bring movement and shadow without hiding your hair’s natural texture. Mermaid waves make a strong starting point: use a curling wand or flat iron, alternating the direction of each curl. This stops the lengths from falling into one uniform pattern. The result feels loose and spell-worn, rather than polished into matching ringlets.
Work through dry hair in manageable sections, curling one away from your face and the next towards it. Keep the curl shape consistent from mid-lengths to ends, then let each section cool before gently separating it with your fingers. A comb can soften the finish, but brushing through every curl may loosen the wave pattern. Leave the ends slightly less defined for an undone edge.
For extra length and fullness, 22-inch or 24-inch seamless clip-in extensions can support long, flowing waves. Blend each piece beneath the top layer, then curl your own hair and the extensions in alternating directions. Match the extension colour closely to your lengths for a seamless effect, or use a contrasting tone to make the costume styling more dramatic.
Costume details change the mood. For a witch, try a deep side part, loose waves and a dark ribbon woven through one side. For vampire styling, keep the parting precise and the waves smoother, with lengths swept behind your shoulders. Wednesday Addams calls for a centre part and a more restrained shape, or two neat plaits instead of loose waves.
For a heat-free version, braid damp hair into sections and let it dry fully before undoing the braids. More braids create tighter bends; fewer, looser braids make broader waves. Separate the finished style with your fingers, then pin one side back if a witch’s hat needs a secure fit. This adds texture without a curling wand or flat iron.
Keep the silhouette intentional: lift gently at the crown for a more dramatic witch, or leave the roots flatter for a sleek vampire effect. If you use a curling wand or flat iron, apply heat protection spray first and work carefully around the hairline. The guide’s full set of Halloween looks can be created at home in under 30 minutes, so this wave pattern fits a quick costume finish.
Before heading out, check that clips feel secure and aren’t pulling at your scalp. Let the waves fall over your shoulders, or pin one side back to show off a statement earring. A dark ribbon, a precise centre part or a hidden colour accent can turn the same mermaid waves into a distinct character.
For a gathered alternative, a messy witch hairstyle can be created by tying back two-day-old hair. It offers a different shape while keeping the costume styling relaxed. The bunches hairstyle is described as suitable for medium-length and long hair, making it another option alongside loose waves. Choose between a gathered bun, bunches or flowing lengths to keep the hairstyle in step with the character’s overall finish.
5. Bride of Frankenstein streaks
The Bride of Frankenstein’s signature look is a bold, pale streak framing dark hair. Echo the contrast with temporary colour, a clip-in weft or a pale ribbon. Keep the accent near the front hairline for instant character, or place it through a side section for a subtler, more wearable effect.
For a quick temporary accent, clip a coloured weft beneath the top layer of hair. Peekaboo colour can be added in about five minutes, with the upper layer concealing the attachment. Choose a pale shade against darker lengths to nod to the Bride, or reverse the contrast for a more personal take. A visible strand defines the look without recolouring every section.
To style a streak into your hair, first choose the parting and decide which side will carry the contrast. Brush a narrow front section away from the rest, then apply a temporary colour product according to its directions. Keep the application precise and protect surrounding hair from stray colour. One defined stripe reads clearly; several scattered marks create a more chaotic, monster-inspired finish.
Short hair can carry an accent beside the parting, while longer hair can take a pale streak from the temple through the lengths. On curls, place the contrast where the curl pattern catches the light. On straight hair, a clean section makes the graphic line sharper. These placements keep the Bride reference recognisable across different cuts and textures.
Pair the streak with a strong silhouette. A centre part and two teased side sections create a dramatic frame, while a sleek ponytail makes the colour the main event. For a softer costume, add loose waves around the streak. Keep accessories simple, such as a dark hair clip, so the contrast stays visible without competing with the rest of the look.
Temporary sprays and dyes differ in application and removal, so follow the product’s instructions and use it only as directed. Avoid coloured or glitter sprays on human hair extensions, as they can be difficult to wash out. If you use a removable weft, keep the colour product on your own hair instead. This protects the accessory and makes the accent easier to remove.
A pale streak also works beyond a full costume: pair it with black clothing, a sharp parting and minimal accessories for a subtle Frankenstein reference. The contrast tells the story. A temporary weft offers a quick change, while a carefully placed colour accent gives the front of your hairstyle a more integrated finish. Choose the method that suits your look and styling time.
Use temporary sprays and dyes only as directed, and follow the product’s instructions for removal. Keep coloured or glitter sprays off human hair extensions, as they can be difficult to wash out.
Heavy Metal Hairdresser: Shag Haircuts
Heavy Metal Hairdresser offers shag haircuts for anyone wanting an expressive shape that works beyond one night of dressing up. A shag can bring texture and movement to your everyday look, giving you a bold base for future costume styling without relying on temporary colour or accessories.
If you’re drawn to the tousled energy of zombie volume or witchy waves, a shag haircut offers a lasting way to wear texture. For a sharper, more alternative silhouette, explore Wolfcuts too. Hair To the Throne and Guest Spots are also part of the salon’s offering.
Bring your ideas, whether you want a subtle shift or a more dramatic shape. Contact Heavy Metal Hairdresser to discuss a shag haircut that fits your style.
Make your next look your own
A costume can be a one-night transformation or the spark for a style you keep wearing. Take the detail you loved most, whether it was a bold shape, a flash of colour or deliberately unruly texture, and let it influence your everyday look. Halloween hair can be a starting point for experimenting with your personal style, not just the finishing touch to a costume.
For a cut with movement and attitude, Heavy Metal Hairdresser offers shag haircuts and wolfcuts. Guest Spots are another way to explore the salon’s creative work. Choose the direction that feels like you, from lived-in texture to a more defined silhouette, and make the look yours beyond the season.
Contact Heavy Metal Hairdresser to talk about a cut that fits your style. Bring your ideas, embrace the unexpected, and keep making space for hair that refuses to blend in.
Frequently Asked Questions
What are easy Halloween hairstyles for adults and children?
Cat-ear shapes, loose bunches and a messy witchy bun are simple options for different ages. For cat ears, shape a 5 cm section of hair at each side of the head, then secure each with pins. Medium-length and long hair can be divided into bunches for a quick character look. For a witch-inspired style, tie back two-day-old hair into a loose bun and let a few strands frame the face.
Which temporary hair dyes and sprays are safe, and how do I remove them?
Choose a product labelled for temporary hair colour, follow its application and removal directions, and keep it away from your eyes. Check the safety directions, avoid irritated skin, and rinse it away if discomfort develops.