
Posted on

How Often Should a Wolfcut Be Trimmed? The Alt-Hair Survival Guide

How Often Should a Wolfcut Be Trimmed? The Alt-Hair Survival Guide

Your wolfcut isn’t a “set and forget” accessory. It’s a living, breathing piece of subcultural architecture that demands respect. If you treat it like a standard haircut, you’ll end up with a flat, generic mullet within weeks. You know the feeling when those aggressive layers start to lose their bite and that razor-sharp fringe begins to blind you. It’s a total vibe killer when the weight shifts to the bottom and your crown volume disappears into nothingness.

One of the most common questions we hear in the studio is: how often should a wolfcut be trimmed to keep that textured edge? We get it. You want to maintain the grit without losing the length you’ve worked hard for. This is your survival guide to keeping your look sharp and unapologetically bold. We’re breaking down the exact signs of a failing shape and the timeline you need to follow to ensure your crown stays high and your layers stay lethal. Let’s make sure your hair never loses its soul whilst you’re out there making noise.

Key Takeaways

  • Master the timeline for your specific length, discovering exactly how often should a wolfcut be trimmed to stop your layers from losing their bite.
  • Identify the critical signs of shape collapse, such as the dreaded “Triangle Head” effect and heavy fringe curtains that kill your crown volume.
  • Tailor your maintenance to your hair type, from frequent internal trims for thick manes to longer gaps that help fine hair build necessary bulk.
  • Protect your aesthetic from DIY disasters by learning why professional layering is the only way to keep the back of your cut looking sharp.
  • Keep your crown volume aggressive and your texture sharp by focusing on strategic reshaping rather than just cutting off length.

Understanding the Wolfcut Growth Cycle: Why Layers Drop

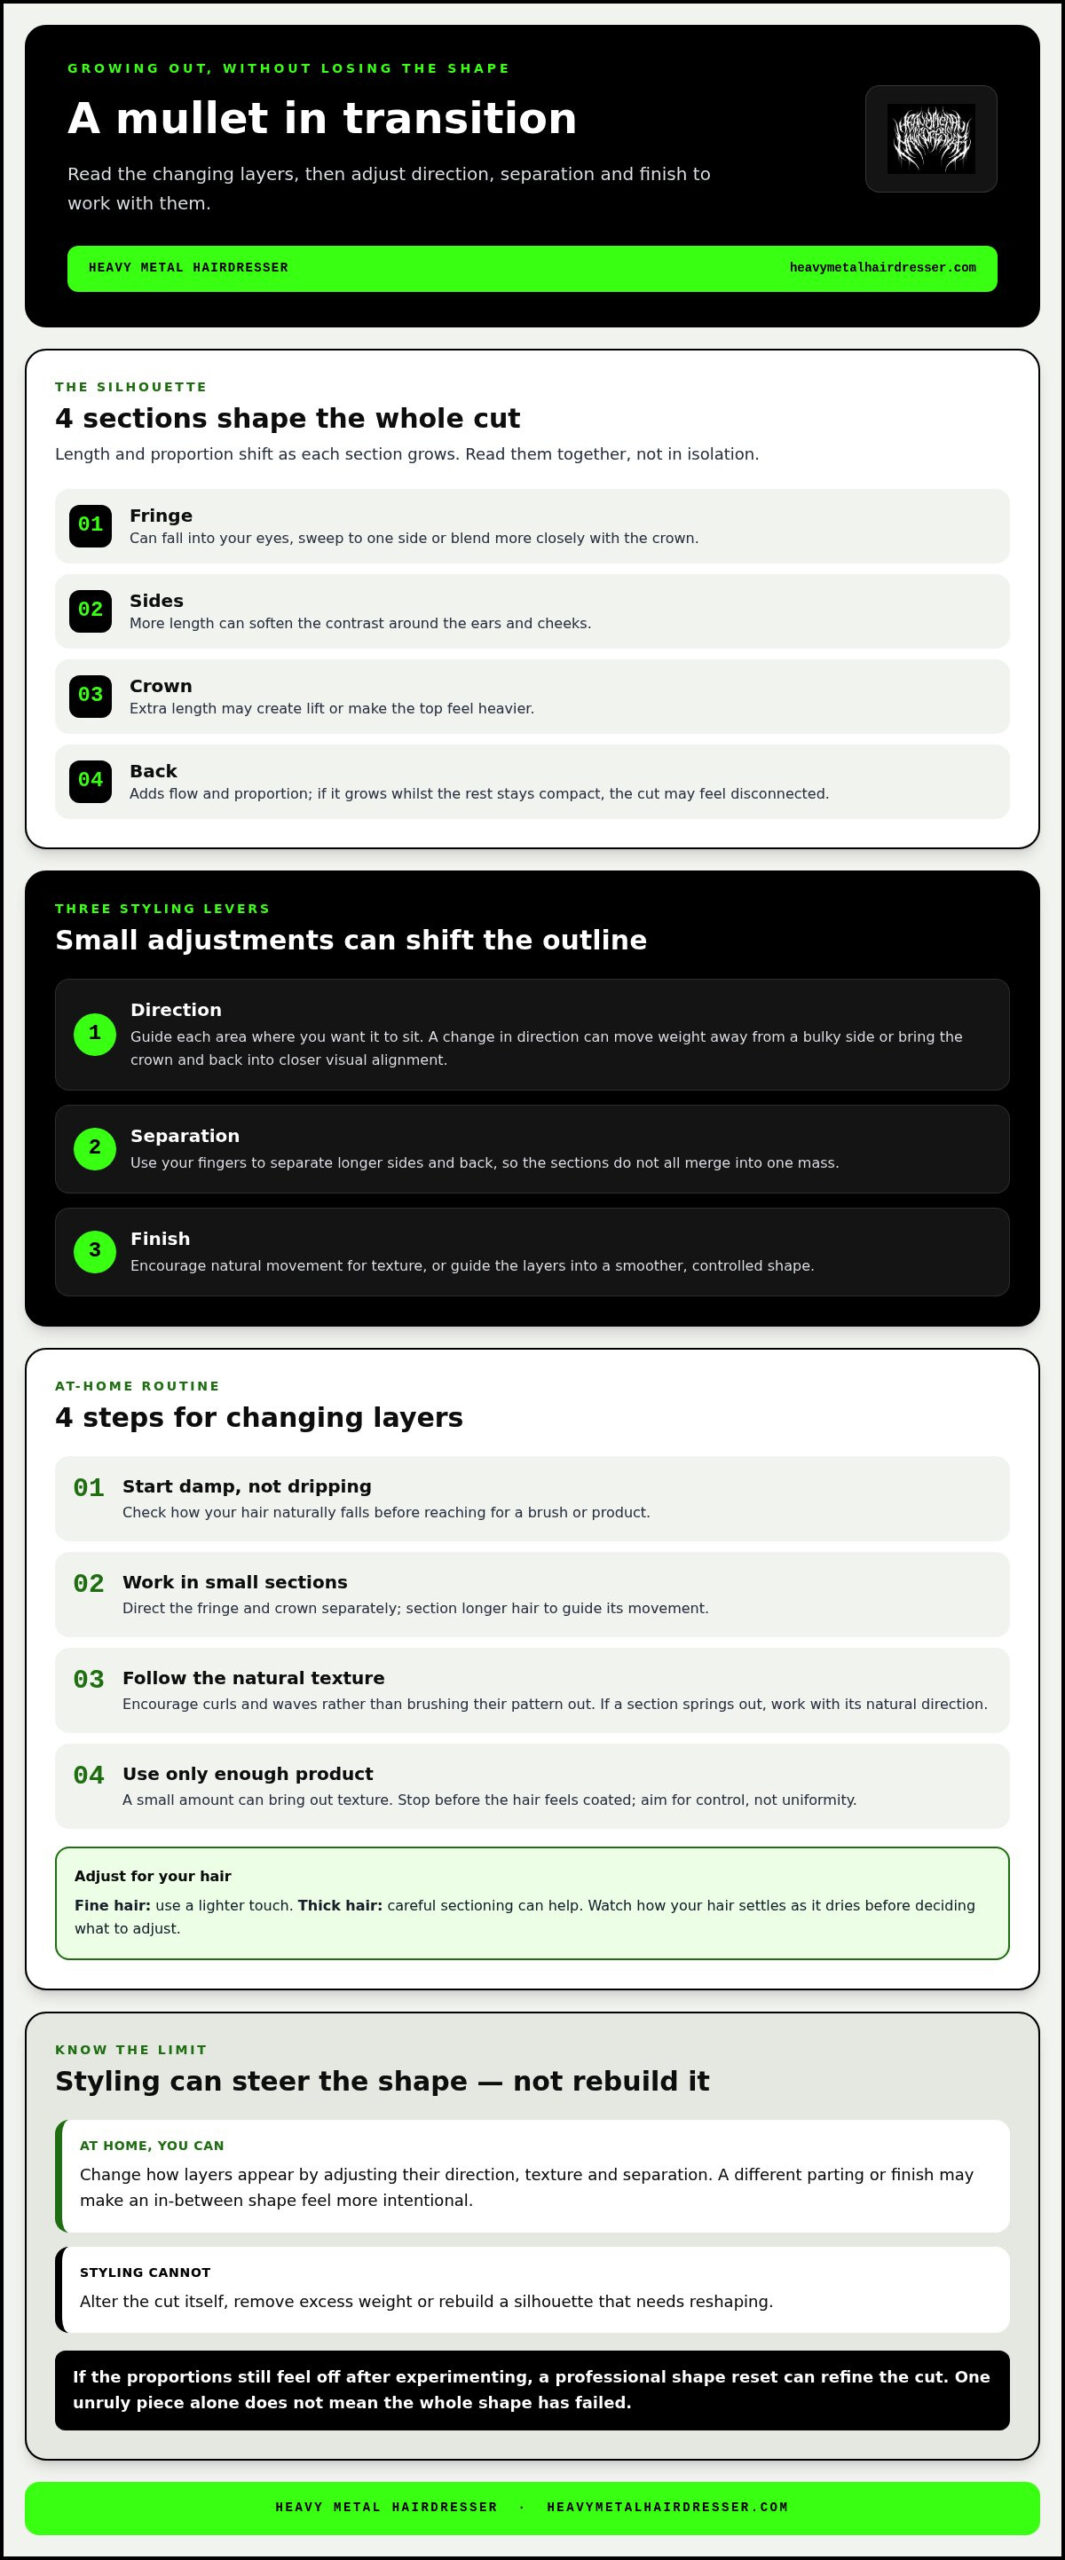
The wolfcut is a high-texture hybrid that demands structural upkeep to maintain its aggressive silhouette. Unlike a standard trim where you’re just lopping off dead ends, maintaining this look is about managing the tension between the disconnected layers. It’s a modern twist on the shag and mullet that thrives on a heavy crown and a lot of internal movement. When you’re wondering how often should a wolfcut be trimmed, you have to look at the architecture of the cut rather than just the calendar.

As your hair grows, gravity becomes the enemy. That massive volume at the top starts to migrate south. If you don’t keep up with the maintenance, your sharp, rebellious wolfcut will inevitably collapse into a flat, uninspired shag. Keeping the “bite” in your layers requires more than just a perimeter cut; it requires strategic internal weight removal. This ensures the hair can still move and stack properly without looking like a solid block of hair. Professional layering is about more than length. It’s about maintaining the “textured grit” that defines your identity.

The Shag vs. Mullet Balance

The top-heavy aesthetic is the soul of the wolfcut. It’s what gives the style its subcultural grit and separates it from mainstream, blended styles. However, this balance is fragile. As the hair grows, the crown loses its lift, and the silhouette shifts. Your fringe length is the primary dictator of the cut’s behaviour. Once those bangs hit your eyes or lose their choppiness, the rest of the layers follow suit, losing their definition. You can keep the length increasing whilst maintaining the grit, but only if you’re keeping the internal structure in check. Without regular intervention, the mullet-inspired tail will start to look disconnected in a bad way, rather than a deliberate, edgy way.

Gravity and the ‘Collapse’ Phase

There comes a specific point in the growth cycle where your layers stop looking textured and start looking blocky. This is the collapse phase. You’ll notice the back length quickly overwhelms the shorter, face-framing pieces that give the wolfcut its edge. Whilst heavy texture can disguise the early stages of growth, it eventually reaches a tipping point. Without a professional touch to reshape the layers, the weight distribution shifts entirely to the bottom, creating a wide, flat shape that lacks the aggressive energy of the original cut. Knowing how often should a wolfcut be trimmed is about catching this collapse before it ruins your aesthetic and leaves you with a shape that’s impossible to style at home.

The General Timeline: When to Book Your Next Session

Booking your next appointment isn’t just about calendar management. It’s about vibe preservation. If you’re wondering how often should a wolfcut be trimmed, the answer lies in your specific length and how much “bite” you want to maintain. For short, aggressive shapes with massive crown volume, you’re looking at a 6 to 8-week cycle. Longer, more relaxed versions can push it to 8 or 12 weeks before the silhouette starts to fail. 2026 trends are leaning into a slightly more lived-in, gritty growth, but there’s a fine line between “effortless” and “unmanaged.” You want it to look like you’ve just come from a festival, not like you’ve forgotten where your hairdresser lives.

If your look relies on a heavy, face-framing fringe, you’ll need to be more disciplined. A bottleneck fringe or a choppy curtain bang usually requires a quick tidy every 3 to 4 weeks just to keep your vision clear. Beyond the fringe, you need routine trims to preserve the layers and prevent the weight from dragging the whole look down. Keeping your appointment regular ensures the texture stays sharp rather than turning into a matted mess. It’s the difference between a deliberate style and a shape that’s simply given up.

The 6-Week Refresh

This is the sweet spot for anyone rocking a shorter wolfcut or a high-contrast vivid colour. At six weeks, we focus on re-establishing that essential disconnection between the top and the bottom. We tighten up the face-framing layers and ensure the fringe hasn’t lost its choppiness. It’s also the perfect time to refresh your roots, ensuring your aesthetic stays as loud as your personality. If you want to keep your wolfcut looking like it was done yesterday, this is your gold standard. It keeps the “step” in your layers aggressive and prevents the crown from going flat.

The 12-Week ‘Total Rebuild’

For those growing out their length or rocking a mid-length shag, twelve weeks is the absolute limit. By this point, the layers have likely grown out into a more uniform shape, and the nape area probably looks a bit too much like an accidental mullet. A total rebuild involves redefining the entire silhouette. We strip out the internal bulk that’s accumulated and re-carve the texture to bring back the volume. Removing bulk from the nape is critical here. Without it, the weight distribution shifts, and you lose that aggressive taper. We focus on thinning out the back whilst maintaining the length, ensuring the movement stays fluid and the shape stays sharp.

How Often Should a Wolfcut Be Trimmed? The Alt-Hair Survival Guide

Signs Your Layers Are Losing Their Edge

Your wolfcut isn’t just a hairstyle; it’s a statement. When it starts to fail, it doesn’t just look “long,” it looks defeated. You’ll notice the aggressive texture begins to soften into a generic shape. This is the moment you need to ask how often should a wolfcut be trimmed to keep that subcultural edge. If your hair is no longer reflecting your grit, the architecture has likely collapsed. It’s about the soul of the cut, not just the length of the strands.

Visual Red Flags

Check your profile in the mirror. Is that crown volume still defying gravity, or has it migrated south? One of the most obvious signs of a failing wolfcut is the “Triangle Head” effect. This happens when the top goes flat whilst the bottom gets excessively wide. Your disconnected layers should look like a series of sharp, intentional steps. If they’ve started to blend into one solid mass, you’ve officially entered the danger zone. The “invisible fringe” problem is another major red flag. This occurs when your layers blend too much and lose their definition, making the cut look muddy rather than sharp.

Look at your fringe. A fresh wolfcut fringe is choppy, airy, and rebellious. As it grows out, it turns into a “fringe curtain.” It loses its bite and starts to hang heavy over your eyes. This isn’t just about visibility; it’s about the loss of the “wolf” silhouette. When the face-framing pieces start to blend into the side length, the whole aggressive energy of the cut disappears. You lose that raw, underground aesthetic that made the cut yours in the first place.

Styling Difficulties

We talk a lot about “Mosh Pit Resilience” in the studio. A proper wolfcut should fall back into place no matter how hard you move. If you find yourself constantly readjusting or if your hair feels “heavy” rather than “textured” during your styling routine, the weight distribution is off. You shouldn’t need half a bottle of product to achieve the same volume you had in week one. If you’re struggling to find the original lines, The Ultimate Wolf Hair Cut Guide can help you identify exactly where your shape has gone rogue.

Finally, pay attention to the nape of your neck. Tangling at the nape is a massive indicator that your disconnected layers have become too heavy. This matting happens because the internal structure is no longer supporting the length. Knowing how often should a wolfcut be trimmed depends on these subtle shifts in behaviour. Once the grit turns to mush, it’s time to get back in the chair and reclaim your edge.

Hair Type Variables: Thick, Fine, and Curly Schedules

Your hair type is the blueprint for your maintenance schedule. It dictates how the weight moves, how the layers stack, and ultimately, how often should a wolfcut be trimmed to keep its soul. A thick mane behaves very differently to fine strands or a head of curly chaos. If you ignore your natural texture, your wolfcut will eventually start to fight you rather than work for you. We don’t believe in one-size-fits-all hair; we believe in structural precision that respects your identity.

Chemical history also plays a massive role in the “feel” of your trim. If you’re rocking vivid colours or high-lift bleach, your hair porosity changes. This can make the ends feel “crunchy” or “snagged” faster than virgin hair. You might find yourself needing a micro-trim more frequently just to keep the movement fluid and the texture looking intentional rather than damaged. It’s about maintaining that healthy, rebellious grit without the fried-end look.

Managing Thick, Alternative Manes

Heavy hair is the king of volume but the enemy of shape. For thick hair, “de-bulking” is far more important than removing length. If you leave it too long, your layers will grow out into a solid, immovable “helmet” that lacks any movement. To prevent this, we recommend an internal trim every 6 to 8 weeks. This isn’t just about the perimeter. It’s about carving out the weight so your hair remains light and responsive. Use a product like Death Grip between sessions to maintain that essential separation and stop your thick layers from merging into a flat wall of hair.

Fine Hair and Curly Chaos

Fine hair is the opposite beast. You actually want a bit of growth to add much-needed bulk to the silhouette. You can often push your schedule to 10 or 12 weeks, as the extra length helps the wolfcut feel more substantial. However, you have to watch for “scraggly” ends. Once the bottom layer loses its density, the aggressive top-heavy look starts to feel disconnected in a weak way. We focus on keeping the ends blunt whilst maintaining the choppiness throughout the crown.

Curly and wavy wolfcuts are a different world entirely. These require a “dry cut” approach. We need to see how the curls sit in their natural state as they grow. Curly wolfcuts actually look better with a bit of “lived-in” growth, but they still need strategic reshaping to maintain the aggressive silhouette. It’s a delicate balance of keeping the curl pattern intact whilst ensuring the crown remains high and the ends stay tapered. If you’re ready to reclaim your shape, book your next wolfcut session with a specialist who understands your specific texture.

Professional Maintenance vs. DIY Disasters

The temptation to grab the kitchen scissors at midnight is real. We’ve all been there. But a wolfcut isn’t a standard trim; it’s an intricate map of disconnection and tension. Trying to hack at your own hair usually leads to a blunt, heavy mess that loses all its subcultural grit. You simply cannot see the back of your head well enough to maintain the aggressive taper that defines this look. When you ask how often should a wolfcut be trimmed, the answer is always “by a professional who understands the scene.”

The “kitchen scissor fringe” is the quickest way to kill your aesthetic. Instead of the airy, choppy texture you want, you end up with a solid, blocky line that looks more like a primary school bowl cut than a rebellious statement. A specialist stylist knows how to organise the layers so they grow out gracefully, ensuring your shape remains lethal even as it gains length. It’s about more than just cutting; it’s about structural integrity and preserving your individuality. A professional session ensures that the “bite” in your layers is restored with precision rather than luck.

The Art of Professional Layering

In our studio, Simon Tuckwell and the crew don’t just “cut hair.” They use specific angles to carve out aggressive texture that works with your natural movement. There is a massive difference between a standard trim and a total re-shape. A re-shape is where the magic happens, restoring the crown volume and thinning the nape to perfection. This level of precision is why the style has seen such a massive shag haircut resurrection across the UK alternative scene. We ensure every layer has a purpose and every cut adds to the overall grit of the silhouette.

Home Care Between Appointments

Waiting for your next session doesn’t mean letting your style go to seed. You need to maintain the lift at the crown to keep the silhouette sharp and the layers distinct. Using Hair To the Throne is the best way to keep that volume high whilst you’re between trims. When it comes to washing and drying, less is usually more. We recommend a “no-brush” rule to preserve that gritty, lived-in texture. Brushing out a wolfcut often turns it into a frizzy cloud, destroying the separation that makes the layers pop. Treat your hair with the same attitude you bring to your wardrobe. Treat your maintenance like a ritual, and your hair will return the favour.

Coming into the salon should feel like a reset. It’s an inclusive safe space where your identity is celebrated, not just tolerated. Professional maintenance isn’t just a chore; it’s a way to reclaim your edge and ensure you’re walking out with the confidence to take on any mosh pit. Don’t risk a DIY disaster when you can have passionate expertise instead. Your hair is your crown; keep it sharp.

Reclaim Your Edge and Protect the Grit

A wolfcut is more than a trend; it’s a commitment to a specific, rebellious energy. Maintaining that sharp, top-heavy volume requires a strategic approach to your hair’s architecture. Whether you’re managing thick manes every six weeks or letting fine hair build bulk for twelve, the goal remains the same: aggressive texture that refuses to blend in. Knowing exactly how often should a wolfcut be trimmed ensures you never wake up with a collapsed silhouette or a heavy fringe that hides your identity.

Don’t let your layers lose their bite or settle for a generic, blocky look. Our studio is a gender-neutral safe space where we specialise in alternative styling for those who live outside the mainstream. We’re the go-to experts for touring bands and artists who need their look to survive the heat of the stage. Book your wolfcut maintenance session with the Heavy Metal Hairdresser crew today. It’s time to restore your crown volume and keep your subcultural grit alive. Stay loud, stay sharp, and never settle for a flat shape.

Frequently Asked Questions

Can I trim my own wolfcut fringe at home?

Don’t do it unless you’re prepared for a blocky, blunt disaster. A wolfcut fringe relies on delicate, choppy disconnection that is nearly impossible to replicate with kitchen scissors in a bathroom mirror. Professional stylists use specific angles to ensure the fringe blends into the face-framing layers without losing its rebellious edge. One wrong snip and you’ve traded your alt-aesthetic for a primary school bowl cut.

Will my wolfcut turn into a mullet if I don’t trim it?

It’s almost inevitable that an untended wolfcut will migrate into mullet territory. Because the hair at the nape usually grows faster and feels heavier, the balance of the cut shifts downwards as the crown layers lose their lift. Without regular intervention to thin out the back and re-shape the top, you’ll lose the “wolf” silhouette and end up with a flat, unintentional mullet that lacks any structural grit.

How do I tell my hairdresser I want to keep the length but fix the layers?

Ask for an “internal re-shape” or “strategic weight removal” rather than a standard trim. Tell them you want to preserve the perimeter length whilst refreshing the disconnected layers at the crown to bring back the volume. Bringing a photo of your hair from week one is the best way to show exactly where the “bite” has disappeared. Most alternative specialists understand that the soul of the cut lives in the layers, not the ends.

Does a wolfcut require a lot of styling every day?

It is a low-maintenance style, but it certainly isn’t no-maintenance. The cut is designed to look lived-in and gritty, so you don’t need a polished blow-dry. However, you’ll still need a minute or two to scrunch in some texture product to keep the layers from falling flat. It’s built for mosh pit resilience, meaning it should look better the more you move, provided the internal structure is still holding up.

What happens if I wait 6 months between trims?

Waiting half a year will cause the structural architecture of the cut to fail entirely. When clients ask how often should a wolfcut be trimmed, we warn them that six months is far too long for a high-texture style. By that point, the weight distribution will have shifted so far south that your hair will look like a solid, heavy mass. You’ll likely need a total rebuild rather than a simple refresh to reclaim your original edge.

Is a wolfcut good for hair that is thinning?

Yes, it’s actually one of the best alternative styles for creating the illusion of density. By cutting short, aggressive layers into the crown, we create natural lift and volume where thinning is often most visible. The choppy texture prevents the hair from hanging limp and flat against the scalp. It’s a powerful way to reclaim your identity and build a bold silhouette regardless of your hair’s natural thickness.

Should I get a wolfcut if I have very curly hair?

Absolutely, but ensure you find a stylist who performs dry cuts. Curly hair adds a massive amount of natural texture and “bite” to the wolfcut, making it look even more aggressive and unique. The key is carving out the layers whilst the hair is dry so the stylist can see exactly how each curl stacks. It’s a brilliant way to manage curly chaos whilst keeping an edgy, subcultural aesthetic.

How do I maintain the vivid colour in my wolfcut between trims?

Time your colour refreshes to match your 6-8 week trim cycle. Between studio visits, use cold water for washing and stick to sulphate-free, colour-safe products to prevent the grit from turning into a faded mess. If you’re rocking high-contrast vivids, the “collapse phase” of your layers often coincides with your roots showing. Refreshing both at the same time ensures your aesthetic stays loud and your silhouette stays sharp.

Posted on

Growing Out a Wolfcut Gracefully: The Alternative Survival Guide

Growing Out a Wolfcut Gracefully: The Alternative Survival Guide

The mushroom stage isn’t a mandatory rite of passage for the alternative crowd. It’s a choice. When those short crown layers start puffing out whilst your lengths look like a disconnected afterthought, it’s easy to feel like your hair has become an accident rather than a statement. We know the frustration of losing that sharp, intentional silhouette. However, growing out a wolfcut gracefully doesn’t mean you have to surrender to a boring, sensible trim or hide under a beanie for six months.

You can keep your rebellious edge whilst navigating the transition. This guide provides a strategic roadmap for your evolution. We’ll explore how to use professional texturising techniques to blend layers and which alternative shapes, like a gritty shag or a refined mullet, will keep you looking sharp. You’ll learn the styling secrets to manage volume, including how a bit of Hair To the Throne can turn unruly puff into intentional texture. It’s time to stop waiting for your hair to grow and start owning the process.

Key Takeaways

  • Identify why the mushroom shelf occurs and how to spot the disconnection points before they ruin your silhouette.
  • Discover the professional secret to growing out a wolfcut gracefully through internal weight removal that keeps your crown flat.
  • Learn how to use high-hold products like Death Grip to turn messy texture into an intentional, subcultural look.
  • Use vivid colour and shadow roots to distract from awkward lengths whilst maintaining a high-impact aesthetic.
  • Map out your hair’s future by following the wolf-to-shag pipeline or evolving into a long mullet.

The Wolfcut Growth Cycle: Why the ‘Mushroom’ Stage Happens

The wolfcut is a masterpiece of aggressive layering. It’s the wilder, modern descendant of the Shag (haircut), designed for maximum volume at the crown and wispy, tapered ends. But that high-impact structure is exactly what makes growing out a wolfcut gracefully such a challenge. The very thing that gives the cut its bite, that extreme disconnection between the top and bottom, becomes a liability once the scissors leave the room.

The “shelf” effect happens because the crown layers are significantly shorter than the perimeter. As it grows, the weight of that hair doesn’t just vanish; it shifts. You move from intentional chaos to a shape that feels like it happened by mistake. Fine hair often loses its volume first, looking flat on top whilst the ends stay wispy. Thick hair does the opposite, expanding horizontally until you’re more mushroom than human. Identifying the disconnection point, usually where the fringe meets the side layers, is the first step in surviving the transition. If that gap isn’t managed, your hair looks like two different haircuts fighting for dominance.

The Physics of the Grow-Out

Gravity is the enemy of the silhouette. As those short top layers gain length, they push outwards before they finally fall downwards. This creates a wider silhouette that can make your face feel overwhelmed. If you have natural curls or waves, the mushroom effect is amplified because the texture adds width exactly where the layers are heaviest. Meanwhile, the “tails” at the back start looking straggly. Without the support of the upper layers to blend them, they look thin and accidental. It’s a psychological hurdle. You have to shift your mindset from “wild and shaggy” to “structured evolution” to avoid the temptation of a buzzcut during month four.

Setting Realistic Expectations for 2026

Patience is a virtue, but a solid strategy is better. Growing out a wolfcut gracefully is a marathon, not a sprint. Here is what the timeline actually looks like:

  • 3 Months: The fringe is in your eyes and the crown is puffy. This is the peak “accidental mess” stage. Focus on pinning back the fringe or using heavy texture.
  • 6 Months: The layers are finally starting to meet. You’re transitioning into long shag territory. The disconnection is less obvious.
  • 12 Months: You’ve achieved a cohesive, long alternative shape. The original wolfcut layers are now mid-length stabilizers.

Don’t wait for a total breakdown before visiting the salon. A “dusting” trim every eight to ten weeks is vital. It removes split ends and subtly reshapes the perimeter without sacrificing the length you’re fighting for. Graceful doesn’t mean boring; it just means looking like you meant for your hair to look that way.

The Technical Transition: Reshaping Without Losing Length

Doing nothing is the quickest way to end up with a haircut you hate. The internet often tells you to just hide under a hat for six months; we disagree. Structural maintenance is what separates a botched grow-out from a deliberate style evolution. To succeed at growing out a wolfcut gracefully, you need a stylist who understands subcultural grit, not just standard layering. Reshaping is about moving the weight around so the hair grows into a new shape rather than just getting bigger.

Internal weight removal is our secret weapon. This involves thinning the crown from the inside. It helps those top layers lay flat against the head instead of puffing out into a mushroom. We also focus on bridge trimming. This technique connects your fringe to the side layers, removing that awkward shelf where the hair looks disconnected. Tool choice is everything here. We use point cutting to create a jagged, textured finish that maintains your edge. Slithering, or slide cutting, is better for blending the long tails into the rest of the cut without losing your hard-earned length. Whilst you learn to maintain and style wolf cut hair during this phase, remember that the goal is a strategic shift in silhouette.

Step 1: The Face-Framing Adjustment

The fringe is usually the first thing to feel “wrong.” To blend a wolf fringe into longer side layers, we use curtain techniques. By angling the cut away from the face, we can hide the shortest layers and create a shaggier, face-hugging shape. This transition allows a micro-fringe to evolve into a heavy, 70s-inspired frame. It keeps the hair out of your eyes whilst maintaining the aggressive attitude of the original cut. If you want to see where this technical journey leads, check out our deep dive into the shag haircut and how it dominates the scene.

Step 2: Internal Texturising

Removing bulk from the mid-lengths allows the top layers to fall further down the head. This elongates the shape. Instead of thinning shears, which often shred alternative textures and lead to frizz, we prefer deep point cutting or channelling. This creates space for the hair to move whilst keeping the ends solid and healthy. These channels act as a guide for the hair to follow as it grows, ensuring the volume stays at the mid-lengths rather than bunching up at the crown. It’s about creating a foundation that looks intentional even as it gains inches.

Styling Through the Awkward Stages with Aggressive Texture

Forget the Dyson Airwrap. A polished blowout might work for the boardroom, but it won’t help you with growing out a wolfcut gracefully. In the alternative scene, we don’t hide the awkward stages under a mountain of hairspray and round brushes. We lean into the chaos. Messy, aggressive texture is your best ally. It blurs the lines between your short crown and your long tails, turning a technical ‘shelf’ into a deliberate aesthetic statement. When your hair looks like it has a story to tell, nobody notices the disconnection.

Maximum hold is non-negotiable when your layers start to fight back. We recommend using Death Grip to pin down those unruly sections. It provides the grit needed to stop the top layers from poofing out whilst keeping the ends looking sharp and intentional. If you are avoiding heat styling to preserve your hair health, try the ‘Tuck and Pin’ method. Small, messy braids or loose buns can help blend disparate lengths. By pinning the shorter layers back into the longer sections, you create a structural look that feels like a choice rather than a struggle. It is about reclaiming your silhouette on your own terms.

The Power of Texture Products

Control is about strategic weight. Use Hair To the Throne to add volume where you want it and weight where you don’t. Salt sprays provide that sun-bleached, desert-punk grit. Pomades, however, offer the weight needed to pull those shorter crown layers down. If your ‘shelf’ is particularly stubborn, mix the two. Apply your pomade to the underside of the top layers to weigh them down; then mist the ends with salt spray. This breaks up the horizontal visual line and forces the layers to mingle. You aren’t just styling your hair; you are camouflaging the transition.

Alternative Accessories and Camouflage

Accessories are tools for reshaping, not just for hiding a disaster. A bandana can flatten a puffy crown whilst leaving your tails free to roam. This creates a classic 80s rock silhouette that feels entirely intentional. Strategic hair slides or hair piercings, such as small metal rings, can draw the eye away from uneven layers. If the volume at the top is truly unmanageable, go for a faux-hawk. Use product to pull the sides tight and let the crown growth become the main event. It turns a growth spurt into a high-impact, subcultural feature that maintains your edge.

Maintenance and Vivid Colour as a Strategic Distraction

Colour is your best tactical diversion. When the silhouette feels off, a shift in pigment can trick the eye. Growing out a wolfcut gracefully often involves managing that puffy crown we discussed earlier. A ‘Shadow Root’ is the ultimate hack for this. By applying a darker, cooler tone at the roots, you create the illusion of depth and recession. This visually flattens the crown, making the ‘mushroom’ effect look intentional and grounded rather than accidental and poofy. It shifts the focus from the volume of the hair to the depth of the shade.

Beyond structural tricks, vivid hair colour allows you to reclaim your identity when the shape feels stagnant. If you’re feeling frustrated by the length, a high-impact neon or deep jewel tone shifts the focus from the shape to the shade. It turns a transition phase into a vibrant statement. We use strategic placement to draw the eye where we want it to go, usually down towards the perimeter to emphasise the length you’ve managed to keep. This makes the grow-out feel like a creative choice rather than a waiting game.

Colour Placement Strategies

Placement is everything. Peek-a-boo colours in the longest layers can visually ‘stretch’ the hair. By using a contrasting bright shade underneath the natural length, you emphasise the longest parts of the cut. A split dye is another powerful tool. It breaks up the symmetry of the head, making any uneven growth stages much less noticeable. Toning is equally vital; keeping those thin ends cool and saturated makes them appear denser and more deliberate. It prevents the ‘tails’ of the wolfcut from looking like a translucent afterthought.

Repairing the Damage

Healthy hair grows faster and looks better. If you’ve been bleaching your way through the alternative scene, your transition layers need extra love. Deep conditioning isn’t a luxury; it’s a requirement for maintaining the integrity of your ends. Split ends are the ultimate enemy of length goals because they travel up the hair shaft, causing breakage that sets you back months. A dusting is a precision trim that targets only the frayed tips of the hair, removing split ends without sacrificing a single millimetre of length. This keeps your hair looking sharp whilst you gain the inches you need for your next evolution.

Ready to use pigment to pivot your look? Book a session for vivid hair colour and let’s plan your strategic grow-out.

Transitioning to Your Next Signature Style

Most mainstream advice suggests that the only way to escape a heavily layered cut is to chop it all into a blunt bob. We disagree. For those in the alternative scene, a bob is often too tame and too predictable. When you are growing out a wolfcut gracefully, you aren’t looking for a safe exit; you are looking for your next high-impact silhouette. Your hair is a canvas. Even the in-between stages are an opportunity for subcultural expression. The goal is to maintain your edge whilst gaining the length you need for your next evolution.

The transition is about strategic patience. By working with the layers you already have, we can pivot your look into something that feels entirely new without sacrificing your identity. Whether you want to lean into a retro rock aesthetic or keep the aggressive disconnection of a mullet, the path forward is about intentional reshaping. You don’t have to look like you’re “waiting” for your hair to grow. You just have to look like you meant for it to look this way.

The Shag Resurrection

The wolf-to-shag pipeline is the most seamless transition available. By repurposing those heavy top layers into a 70s-inspired the shag haircut, you create a look that is far easier to maintain as it continues to grow. Instead of fighting the crown volume, you embrace it. We merge the original wolf fringe into a shaggier, curtain-style frame that hugs the face. This provides a softer, rock-and-roll vibe that looks effortless. The shag is the natural successor because it thrives on the same textured foundation as the wolfcut but allows for a more cohesive, elongated shape.

The Modern Mullet Pivot

If you aren’t ready to surrender the aggression, the modern mullet haircut is your best move. You can lean into the ‘business in the front, party in the back’ energy whilst your hair gains inches. We transition the side layers into a tighter, more tapered shape whilst letting the back length reach the shoulders. This keeps the grit alive and prevents the hair from looking like a shapeless mass. It is a bold way to manage growth that prioritises attitude over traditional blending.

Mapping out this evolution isn’t a DIY job. You need to consult with an alternative hair specialist to map out your 12-month hair journey. They understand how to balance the weight distribution so you never hit that dreaded ‘accidental’ stage. A professional can identify exactly when to pivot the shape and when to leave it alone. Your hair is an extension of your identity; don’t let a growth phase dull your spirit.

Own Your Evolution

Growing out a wolfcut gracefully doesn’t mean you have to settle for a boring “in-between” look or hide under a hat for a year. It is about a strategic evolution. You have learned that internal weight removal can kill the mushroom effect and that vivid colour serves as the ultimate tactical distraction. Whether you are pivoting into a rock-and-roll shag or a long, aggressive mullet, the transition is just another stage of your self-expression. It is a process of refinement, not a period of waiting.

Don’t let your hair look like an accident. As creators of the professional-grade Death Grip texture range, we know how to handle subcultural grit without losing the plot. We are a gender-inclusive safe space for all identities, specialising in the textured, alternative styles that the mainstream simply doesn’t understand. We will map out your journey so you never lose your edge. Book your transition session with an alternative specialist at Heavy Metal Hairdresser and turn your growth cycle into a signature statement. You’ve got the vision; we’ve got the expertise to make it happen.

Frequently Asked Questions

How long does it realistically take to grow out a wolfcut?

It typically takes six to twelve months to move from a wolfcut to a cohesive mid-length style. The first three months are the most challenging because the crown layers are still short and disconnected. By month six, the weight starts to drop, and by a year, you have achieved a solid alternative shape. Patience is vital, but strategic reshaping makes the wait feel much shorter.

What is the ‘mushroom stage’ and how do I fix it?

The mushroom stage occurs when the short crown layers grow out horizontally, creating a rounded, puffy silhouette. You fix this through internal weight removal, which thins the hair from the inside so it lays flatter against the head. This technique allows you to maintain your length whilst killing the unwanted volume. It turns a growth spurt into a deliberate, manageable shape that stays edgy.

Can I grow out a wolfcut without cutting it into a bob?

You absolutely can grow out your hair without resorting to a traditional bob. Transitioning into a shag or a long mullet allows you to keep your alternative edge whilst gaining length. These styles repurpose your existing layers rather than cutting them all to one length. It is the best way of growing out a wolfcut gracefully without losing your subcultural identity to a tame, mainstream cut.

How often should I trim my hair while growing out a wolfcut?

Plan for a precision trim every eight to ten weeks to keep the shape intentional. We call this a dusting, which focuses on removing split ends and cleaning the perimeter without sacrificing length. Regular maintenance prevents the ends from looking straggly and ensures the layers blend as they grow. If you wait too long, the shape collapses into a mess that is much harder to fix later.

Which products are best for styling an awkward-length wolfcut?

High-hold texture products like Death Grip are essential for controlling unruly transition layers. You need products that provide grit and weight to pull the crown layers down whilst defining the ends. Hair To the Throne is another favourite for adding volume exactly where you want it. Avoid heavy oils that make thin ends look greasy; stick to matte pastes and salt sprays for that authentic alternative finish.

Will my hair look thin at the ends while it grows out?

Yes, the ends often look thin because the original cut relies on heavy tapering and tails. As the hair grows, this disconnection becomes more obvious. You can combat this by having your stylist thicken the perimeter during your dusting appointments. Using darker vivid colours or toners on the ends can also create the visual illusion of more density whilst the top layers catch up with the length.

Can I transition my wolfcut into a mullet or a shag?

Transitioning into a shag or a long mullet is the most logical path for any wolfcut. The shag uses your existing crown layers to create a 70s rock silhouette, whilst the mullet leans into the disconnection for a more aggressive look. Both styles are natural successors that thrive on the same textured foundation. They allow you to evolve your style rather than just waiting for it to change on its own.

How do I style my fringe while it grows out to meet the side layers?

Use curtain fringe techniques to blend your fringe into the side layers as it gains length. By angling the hair away from your face, you hide the disconnection point and create a face-hugging frame. You can also use small braids or subcultural hair slides to pin back the shortest sections. This keeps the hair out of your eyes whilst maintaining the gritty, intentional vibe of your original alternative cut.